
Quality workflow
Compress video without losing quality
A practical review workflow for shrinking a video while protecting the details viewers actually notice: faces, text, gradients, motion, audio, and playback compatibility.
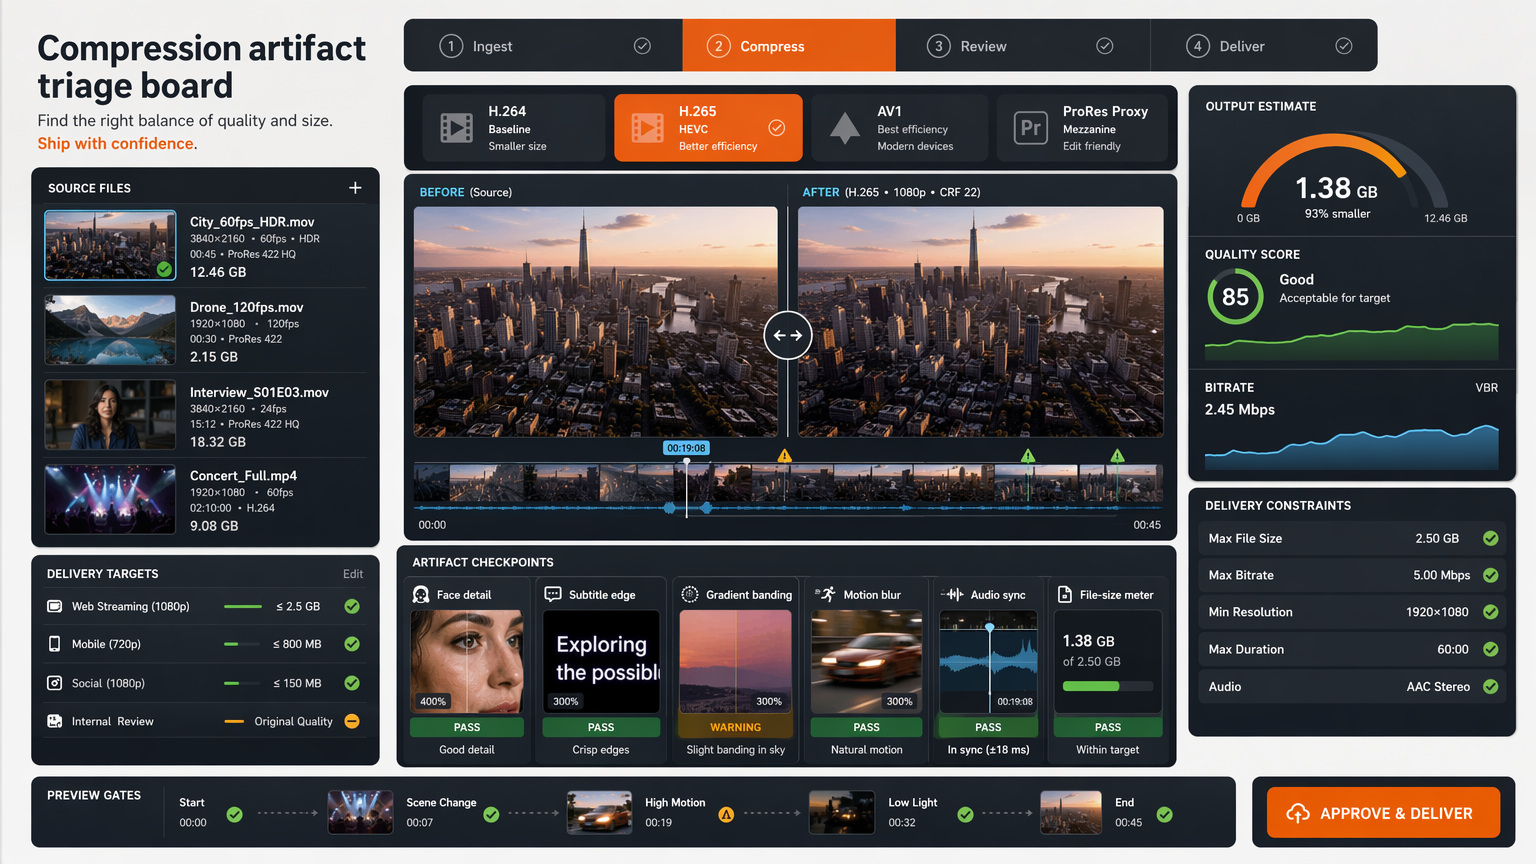
Most compression advice collapses to a single tip: pick a CRF, lower the bitrate, export. That works often enough to feel like wisdom, and it fails quietly in the moments that actually matter, the frame with the small print, the fast pan, the face in low light. The reason it fails is that it treats quality as a property of the whole file, when viewers judge it on the few seconds they actually inspect.
The reliable pattern is the opposite of a universal preset. Name the viewer and the destination first, find the section of the source most likely to break, change one compression lever at a time, and stop the moment extra savings start removing detail a real person needs. This article walks through that workflow end to end, with the specific checks that turn a subjective guess into a decision you can defend after the export finishes.
Section 1Define quality by the viewer's job
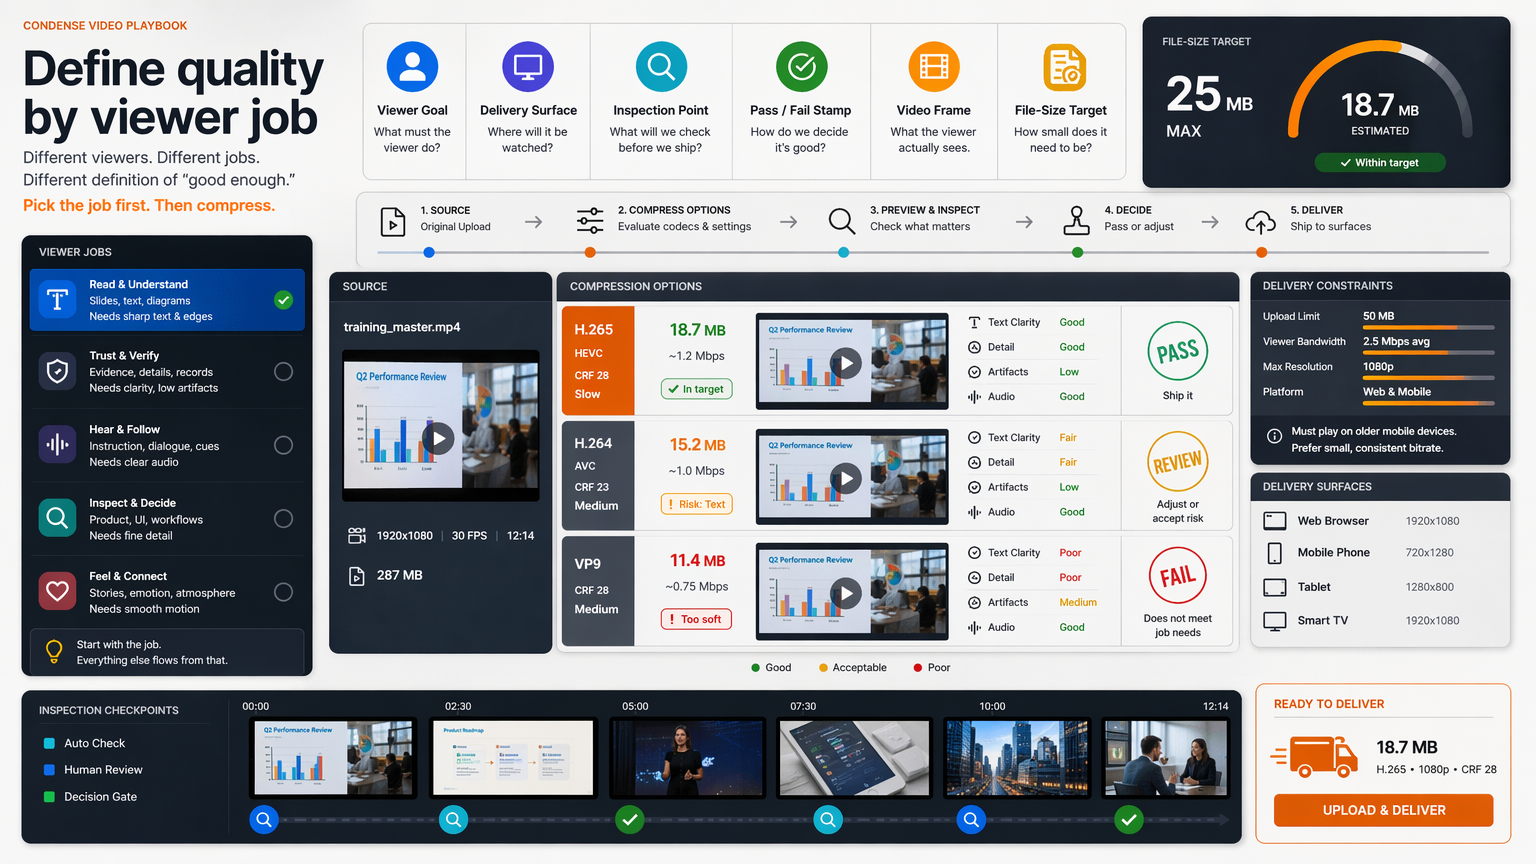
Quality is not a number on a dial; it is whether the viewer can still do what they came to do. A talking-head interview tolerates aggressive compression because the signal is a face and a voice. A screen recording of a settings menu does not, because the entire value is in text that becomes unreadable the moment edges blur. Two clips can land at the same bitrate and feel completely different, because they are judged by different failures.
Objective metrics like VMAF and SSIM are useful as guardrails, but they average over the whole frame and the whole timeline, which is exactly where they diverge from human perception. A clip can score well overall and still fail at the one moment a viewer rewinds. Treat metrics as a coarse filter, then anchor the final call to the viewer's actual task: can they read the text, recognise the face, follow the action, hear the words?
The practical move is to write the acceptance test before you touch a setting. "On-screen captions stay legible at full screen on a phone" is a test. "Looks good" is not. Once the test is named, every compression decision has a clear pass or fail instead of a feeling.
Picture a software tutorial where a cursor clicks a small button labelled "Export." If that button stays legible, the lesson lands; if it smears into the background, the whole video is useless regardless of how clean the rest looks. That single label is the acceptance test, and it is worth more than any average quality score the encoder can report.
Audit the source before changing settings
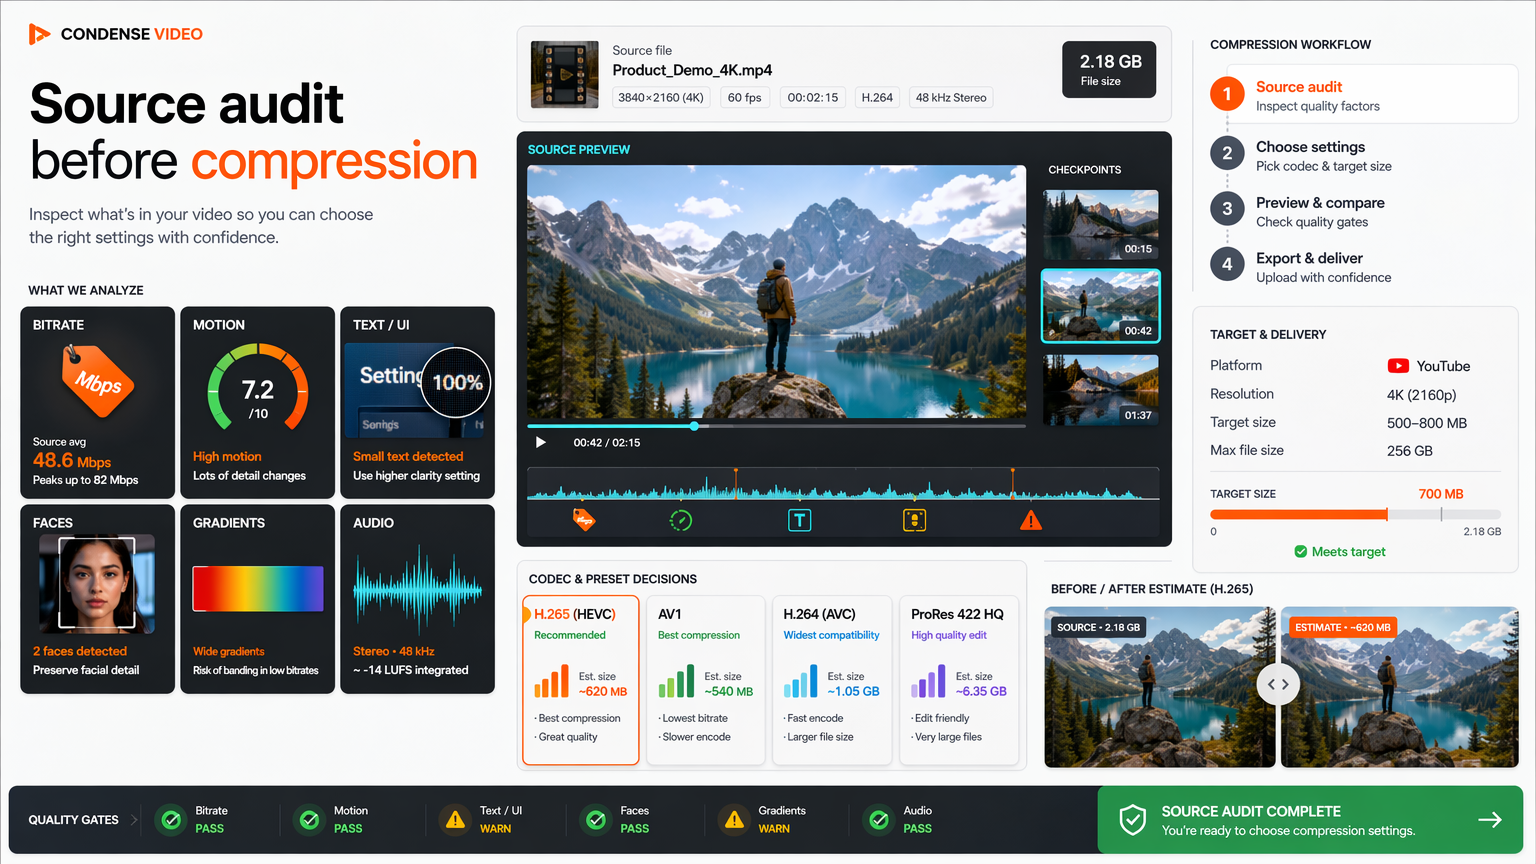
Before changing anything, read what you have. Probe the source for codec, bitrate, resolution, frame rate, colour space, and audio format. A 4K master delivered at 6 Mbps and a 1080p clip at the same bitrate are not the same problem; one has headroom to cut, the other is already on the edge. You cannot protect quality in a file you have not examined.
A source that has already been heavily compressed carries the ghosts of every previous encode. Re-encoding it compounds artifacts, banding deepens, edges soften, grain turns to mush, in a process called generation loss. Sometimes the single best quality decision is not to recompress at all, or to recompress only the parts that changed. Knowing the source's history prevents you from spending bitrate fixing damage the last encoder caused.
Pay attention to the hard parts during the audit, not just the average. Note where motion is densest, where fine text or logos sit, where dark gradients will band, and where audio peaks. This map becomes the agenda for the rest of the workflow: you will compress the whole file, but you will review it at these exact points.
In practice this means running a probe over the file before you open an encoder, reading the bitrate, the frame size, whether the audio is already low-bitrate AAC that further compression will only hollow out. Five minutes of source literacy saves an hour of guessing at settings, because the right strategy for a clean 4K master and a brutalised re-share are not even close to the same.
Pick the section most likely to fail
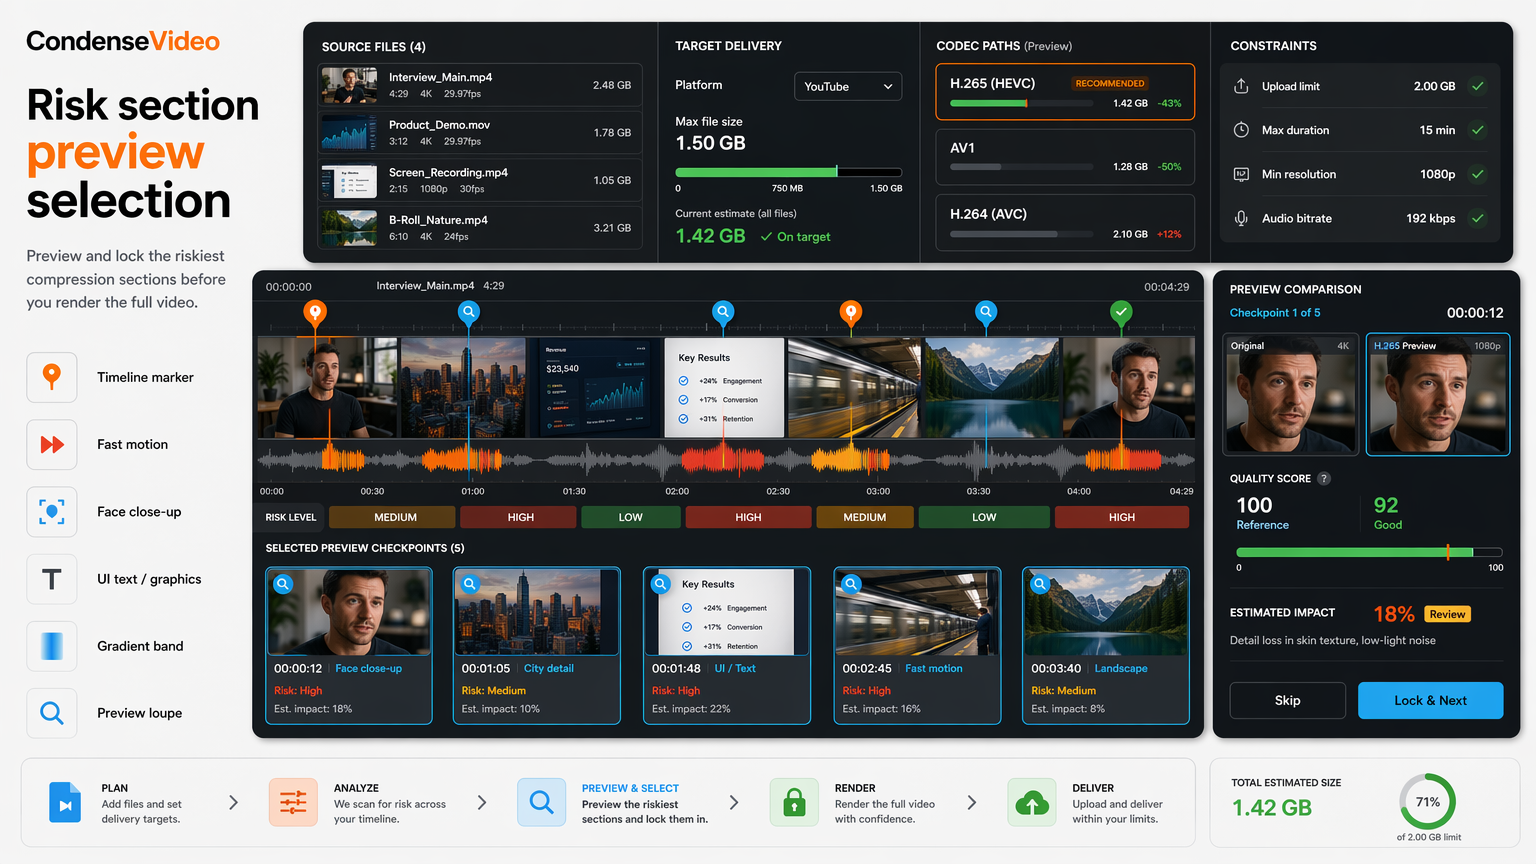
Compression does not fail uniformly; it fails locally, in the hardest few seconds, long before the average quality drops. Fast motion, fine detail, dissolves, confetti, water, and dark skies are where encoders spend their budget first and where artifacts appear first. If you preview only the calm opening of a clip, you will approve settings that collapse in the middle.
The discipline is to find the worst window before you commit to a render. Scrub to the busiest scene, the tightest text, the fastest cut. That five-to-ten-second window is your test track. Settings that survive it will survive the rest; settings tuned only on easy footage will not.
This also reframes what a preview is for. A preview is not a trailer of nice moments, it is a stress test of the risky ones. Choosing the riskiest section deliberately is what separates a preview that catches a problem from one that rubber-stamps it.
A wedding videographer knows this instinctively: the confetti toss, the sparkler exit, the first dance with moving lights, those are the seconds that break first, and they are the seconds the client rewinds to watch. Preview exactly those, because a settings choice that sails through the ceremony speeches can fall apart the moment the confetti flies.
Choose codec and format by destination
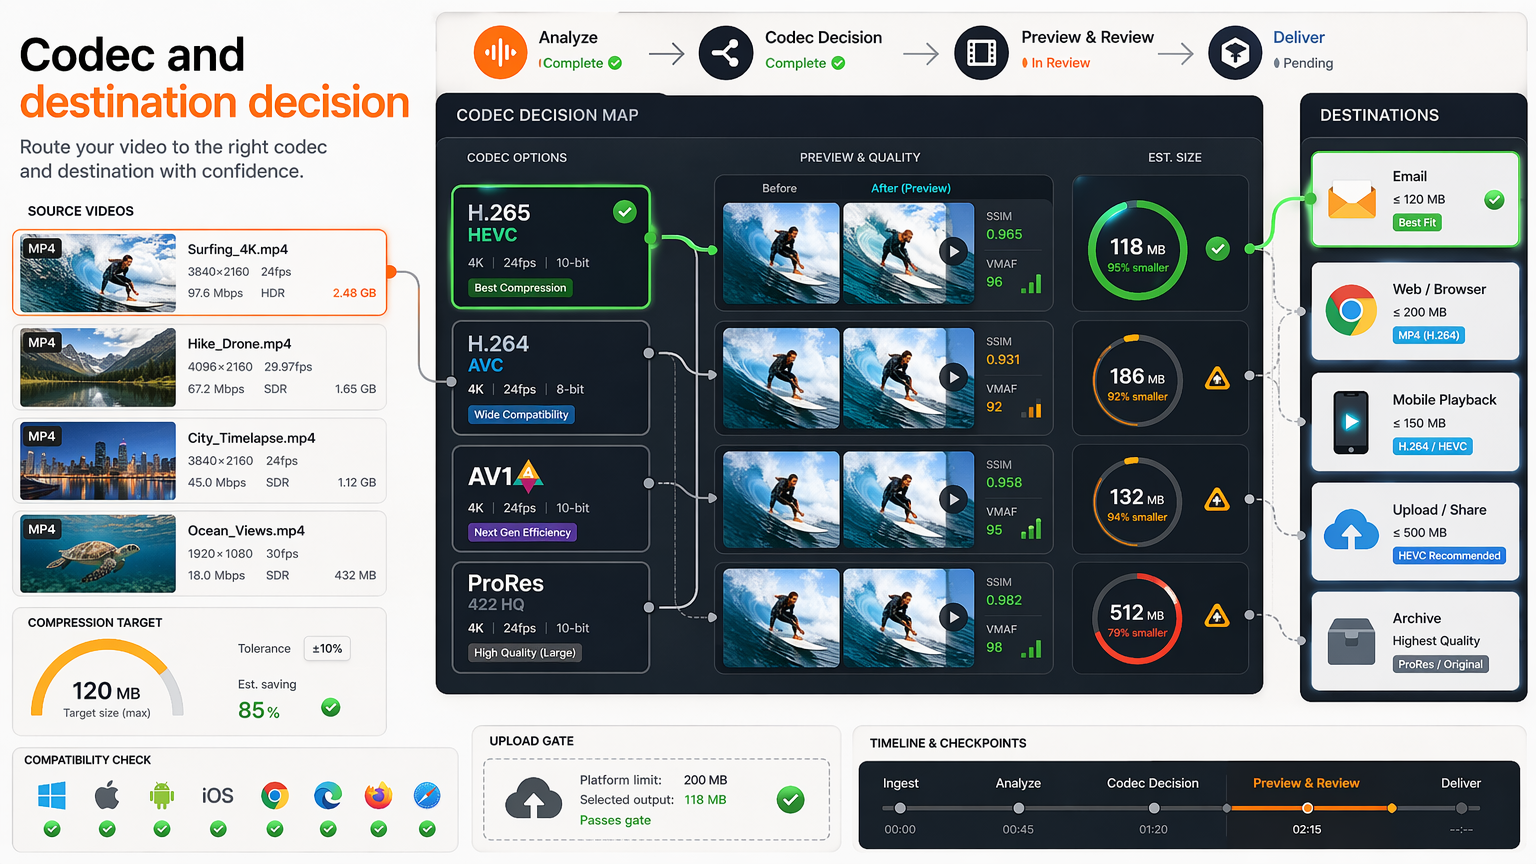
The codec decision starts with where the video will be watched, not with which codec is newest or most efficient on paper. A file that is 30 percent smaller but will not play on the recipient's device is not a saving; it is a failure. Delivery context, browser, mobile app, email client, set-top box, or download, sets the real constraint.
For broad compatibility, H.264 in an MP4 container remains the safe floor: it decodes essentially everywhere, including legacy players and locked-down corporate machines. HEVC and AV1 deliver better compression, but only when you know the audience can decode them. On the open web and in email, where you cannot control the viewer's device, compatibility usually outweighs the extra efficiency.
The efficient move is to let the destination pick the codec and treat efficiency as the secondary optimisation. A web embed where you control playback can use a modern codec with a fallback; a download or an email attachment should default to the format most likely to just work. One source can produce several derivatives, each matched to its channel.
A concrete split: serve an H.264 MP4 for the download link anyone might click, and offer an AV1 or HEVC stream for the in-page player where you can fall back gracefully if the browser lacks the decoder. Same master, two outputs, each optimised for a different certainty about the viewer, instead of one compromise file that is mediocre for both.
Change one lever at a time
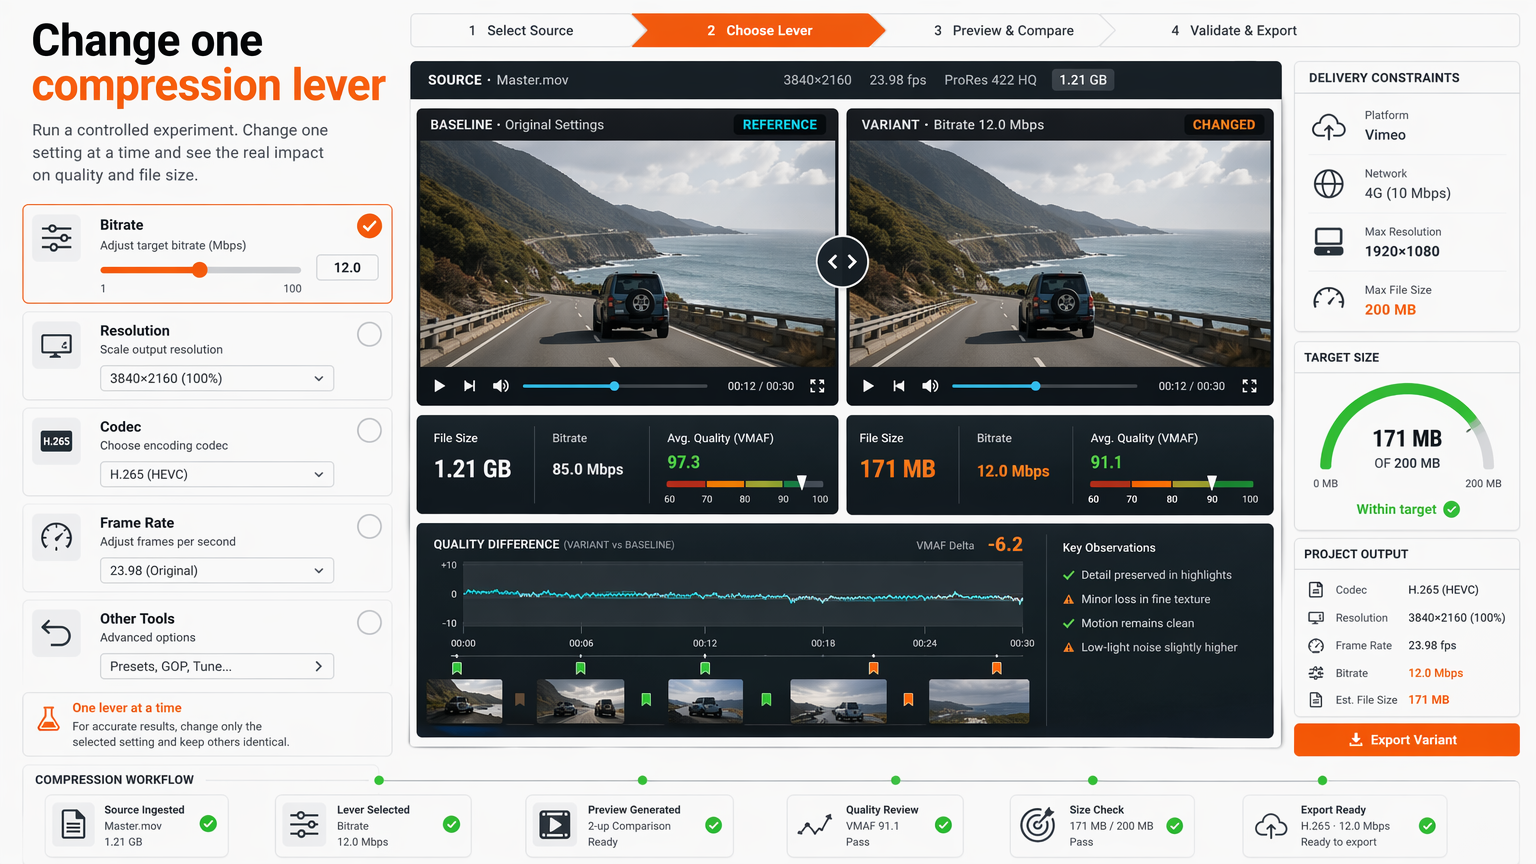
When an export looks wrong, the temptation is to twist several settings at once, drop the bitrate, lower the resolution, switch the codec, and export again. That feels productive and teaches you nothing, because you cannot tell which change helped and which hurt. A result that improved might have improved despite one of your changes, not because of them.
The rule that keeps decisions legible is to move one lever per pass: bitrate, or resolution, or the quality factor, or the codec, never all of them together. After each pass, compare against the previous output and note what changed and why. This is slower on the first clip and far faster on every clip after, because you build a mental model of how each lever behaves on your footage.
Keep a short log of each attempt: the setting, the resulting size, and whether the risky section passed. The log is what turns a string of guesses into a repeatable recipe, and it is what lets a teammate reproduce your result without starting from scratch.
A simple log might read: "CRF 23 → 42MB, text sharp; CRF 28 → 31MB, text starting to soften; CRF 26 → 36MB, text still sharp." Three lines, and you have a defensible setting plus the evidence for why you chose it. That log is also the thing you hand to the next person so they do not rerun your entire search.
Build a visual review checklist
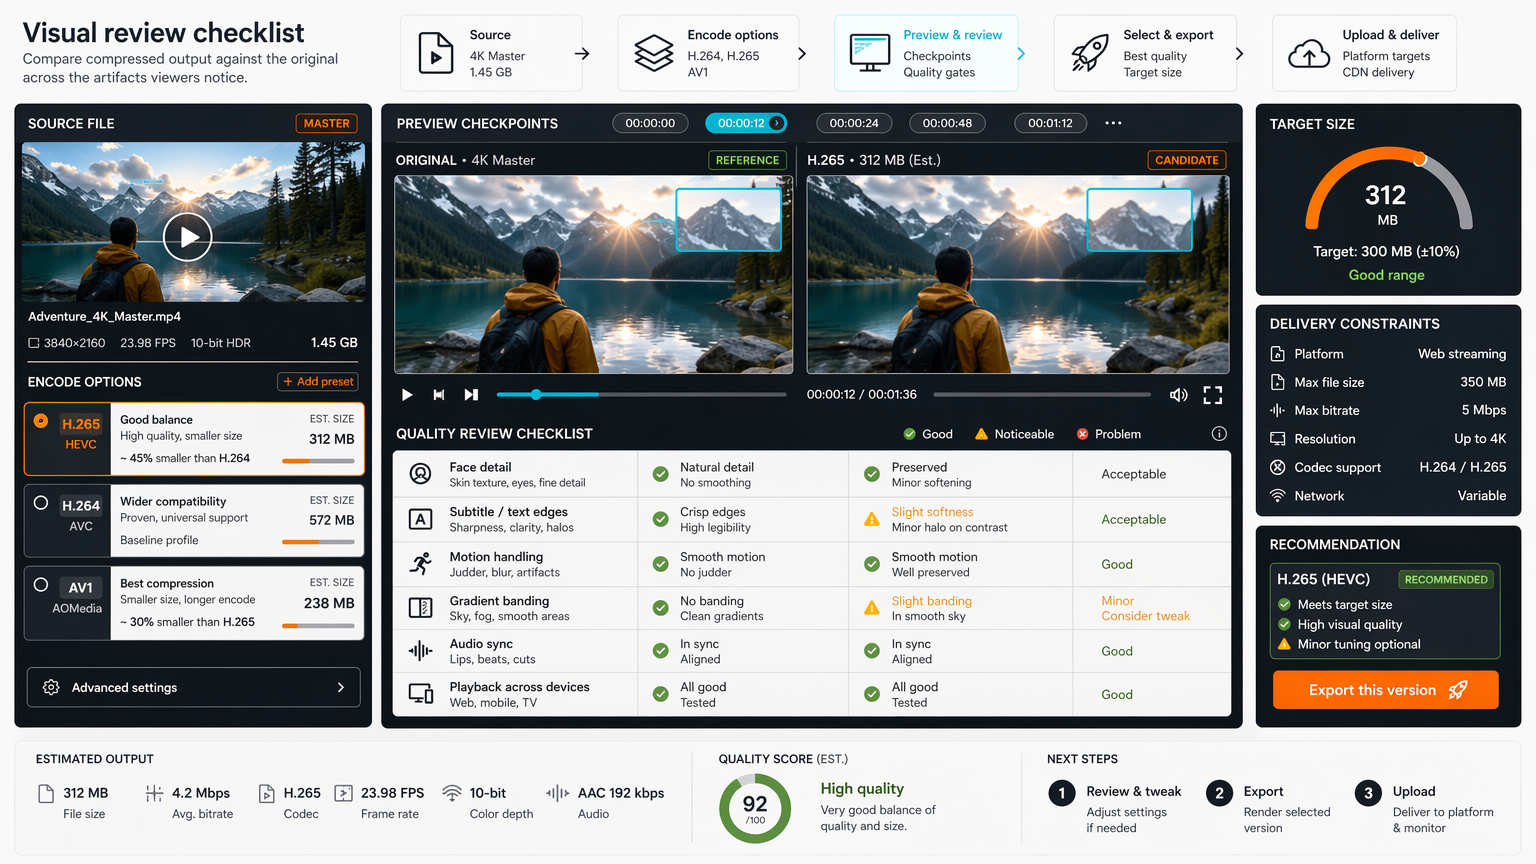
"Looks fine" is not a quality gate, because two people rarely mean the same thing by it and one person means different things before and after lunch. A checklist converts a fuzzy impression into a list of specific things to confirm, so the review is the same every time and another person can repeat it.
The useful checks are the ones tied to the viewer's task: is the on-screen text still readable, are faces recognisable, do gradients band in dark areas, is motion stable or smeary, is audio in sync, does it play on the target device? Each is a yes-or-no question. If any answer is no, the setting is not ready, regardless of how small the file is.
A checklist also sets a natural stopping point. When every check passes, you are done; you do not keep compressing for a smaller number. That is what prevents the common failure of trading away a detail the viewer needs in pursuit of a percentage that nobody asked for.
An effective checklist is short and specific: "captions legible at 50% player size," "faces recognisable in the dim scene," "audio matches lip movement," "plays on a mid-range phone." Four or five concrete checks beat twenty vague ones, because each one is something you can actually fail and then fix rather than nod through.
Stop when savings stop being useful
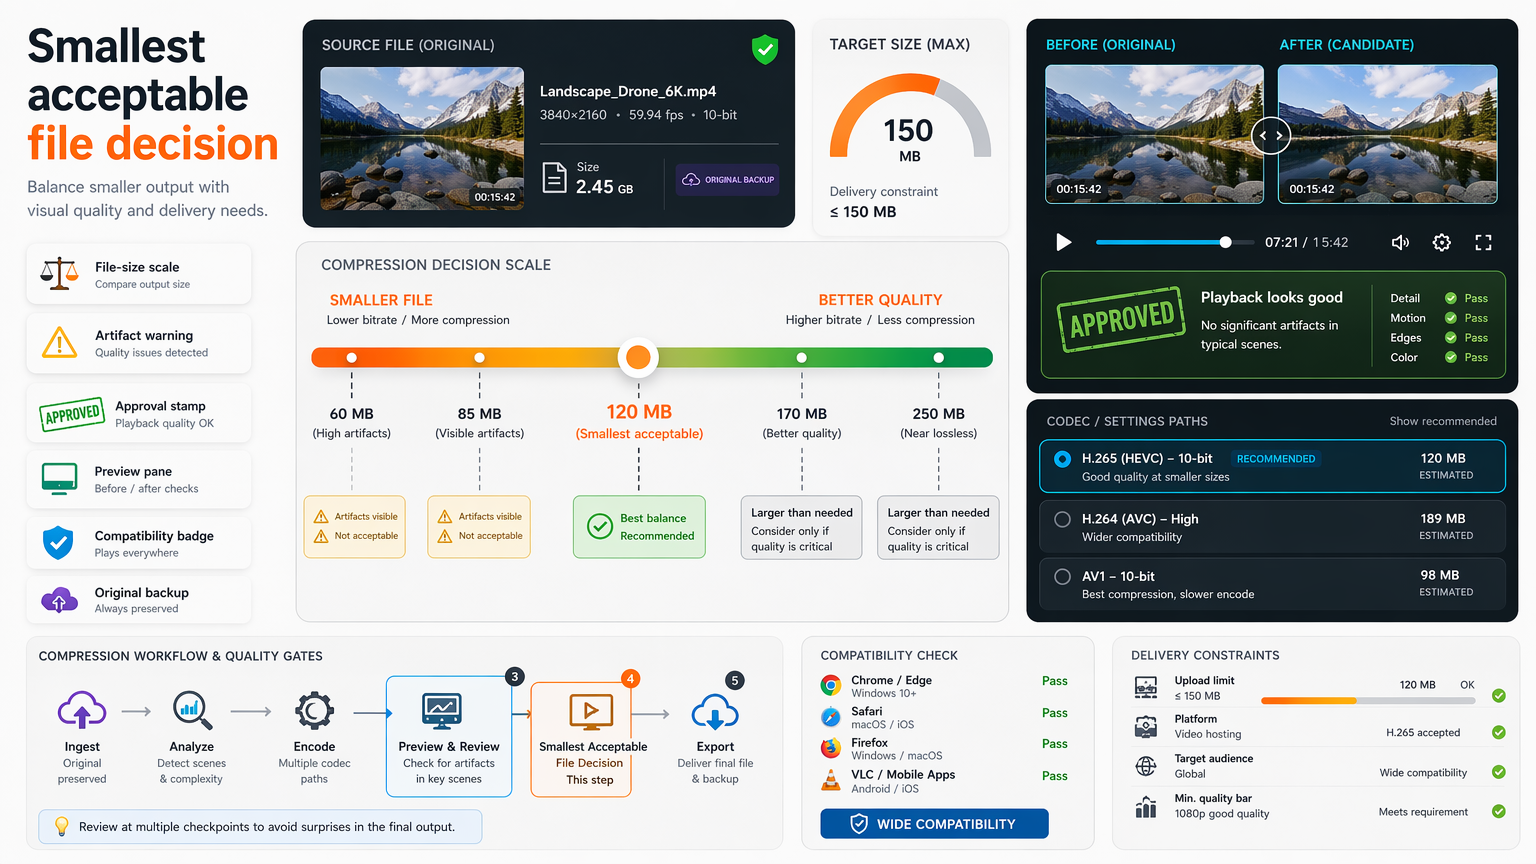
Compression has steeply diminishing returns. The first cuts are cheap, trimming dead air, normalising audio, dropping excess resolution, and they remove real size with little quality cost. Past a certain point, every additional percent of savings comes directly out of the detail a viewer needs, and the file gets worse faster than it gets smaller.
The mistake is to chase a round number: "under 50 megabytes," "70 percent smaller." If the acceptance test already passes at 60 percent reduction, the remaining 10 percent is bought with visible damage. Define the threshold by the task, hit it, and stop. A slightly larger file that still works is the correct result; the smallest possible file is often the wrong one.
This is where the acceptance test earns its keep. It gives you permission to stop, which is hard to grant yourself when a slider still moves. The smallest acceptable file, the one that passes every check, is the target, not the smallest conceivable file.
Think of it as a budget, not a contest. You have a quality allowance defined by the acceptance test, and each increment of compression spends it. Once the test is at risk, further compression is overspending on a file that was already good enough, and you only notice the damage when a viewer complains that the text they needed is now unreadable.
Keep the original until playback is proven
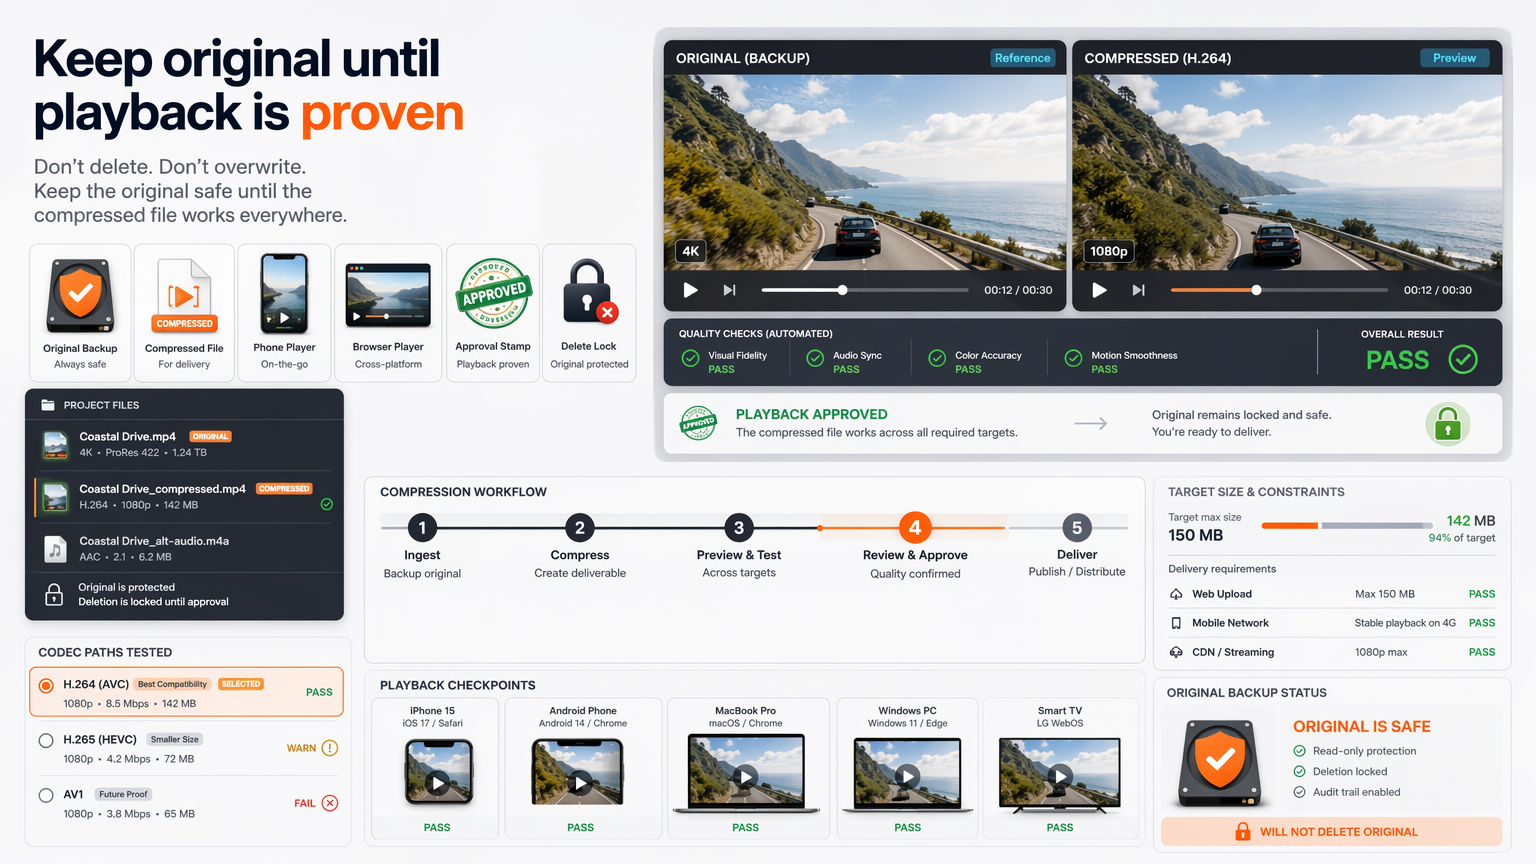
The single most expensive mistake in compression is deleting the source before the output is verified on the real target. An export that looks perfect on your editing monitor can stutter on a phone, fail to play in an older browser, or lose audio sync on a particular device. Once the source is gone, none of those problems are recoverable.
Treat the original as the safety net until the decision is proven in the wild. Keep the source, the preview, and the final export together long enough to confirm playback on the actual device and delivery path. Only then archive or delete. This keeps every decision reversible up to the last moment.
The final check is deliberately mundane: does it open, does it play start to finish, is the audio in sync, is the key detail legible, does it fit the delivery limit with margin? If yes, record the accepted settings so the next upload starts from evidence instead of guesswork. That audit trail is what makes the whole workflow repeatable.
The failure mode is always the same: you delete the source to save disk space, the recipient replies that the video will not play on their phone, and now the only fix is to find the original again or re-record. Keeping the source for a few extra days costs nothing; losing it the day before a delivery goes wrong costs the whole project.
Compression decision checklist
- Name the viewing context before changing settings
- Preview the riskiest section, not the easiest one
- Inspect faces, text, gradients, fast motion, and audio sync
- Use MP4/H.264 when compatibility matters more than maximum savings
- Stop when the target is met and visible damage begins
The discipline is simple to state and harder to practise: define quality by the viewer's task, read the source before you touch it, stress-test the riskiest section, move one lever at a time, and stop the moment further savings start costing real detail. Keep the original until the output is proven on the device that matters, and write down the settings that passed. Done consistently, compression stops being a gamble and becomes a decision you can hand to a teammate and defend after the export finishes.